
Mini-split installation steps: Save 30-50% on HVAC
If one room in your Newark, DE home bakes while another stays freezing, and your electricity bill keeps climbing, a ductless mini-split system might be exactly what you need. These systems let you control temperatures room by room, and mini-splits save 30-50% on energy compared to traditional ducted setups. But the savings only show up when installation is done correctly. This guide walks you through every stage, from understanding the basics to post-install checks, so you can avoid costly mistakes and get the most out of your investment.
Table of Contents
- Understanding mini-split HVAC basics
- Preparation: Sizing, tools, and materials checklist
- Step-by-step installation process
- Troubleshooting, common mistakes, and post-install checks
- Our perspective: What truly separates a successful mini-split install
- Where to find trusted mini-split installation help in Newark, DE
- Frequently asked questions
Key Takeaways
| Point | Details |
|---|---|
| Proper sizing is vital | Using Manual J ensures your mini-split is the right fit, maximizing comfort and efficiency. |
| Quality installation prevents issues | Correct mounting, electrical, insulation, and drainage make your system last and save money. |
| Energy savings are substantial | Mini-splits can cut energy costs by 30-50% by eliminating duct loss and allowing zone control. |
| DIY is possible but challenging | Most homeowners can install mini-splits but professional expertise guarantees best results. |
Understanding mini-split HVAC basics
A mini-split system has two main components: an indoor air-handling unit and an outdoor compressor. A small conduit connecting them carries refrigerant lines, a power cable, and a drain line. No ductwork required. That simplicity is exactly what makes them so efficient.
Understanding how HVAC works helps you appreciate why duct losses are such a big deal. In traditional systems, ducts can leak 20-30% of conditioned air before it ever reaches the room. Mini-splits bypass that problem entirely. They deliver conditioned air directly where you need it, with no energy wasted in transit.
Why Newark, DE homeowners are making the switch:
- Zoned comfort: each room gets its own thermostat setting
- No duct installation or existing ductwork required
- Quieter operation compared to window units
- Works as both a heater and a cooler in one unit
- Eligible for federal and state energy efficiency incentives
When comparing HVAC system types, mini-splits consistently rank high for flexibility and efficiency, especially in homes where adding ductwork would be expensive or impractical.
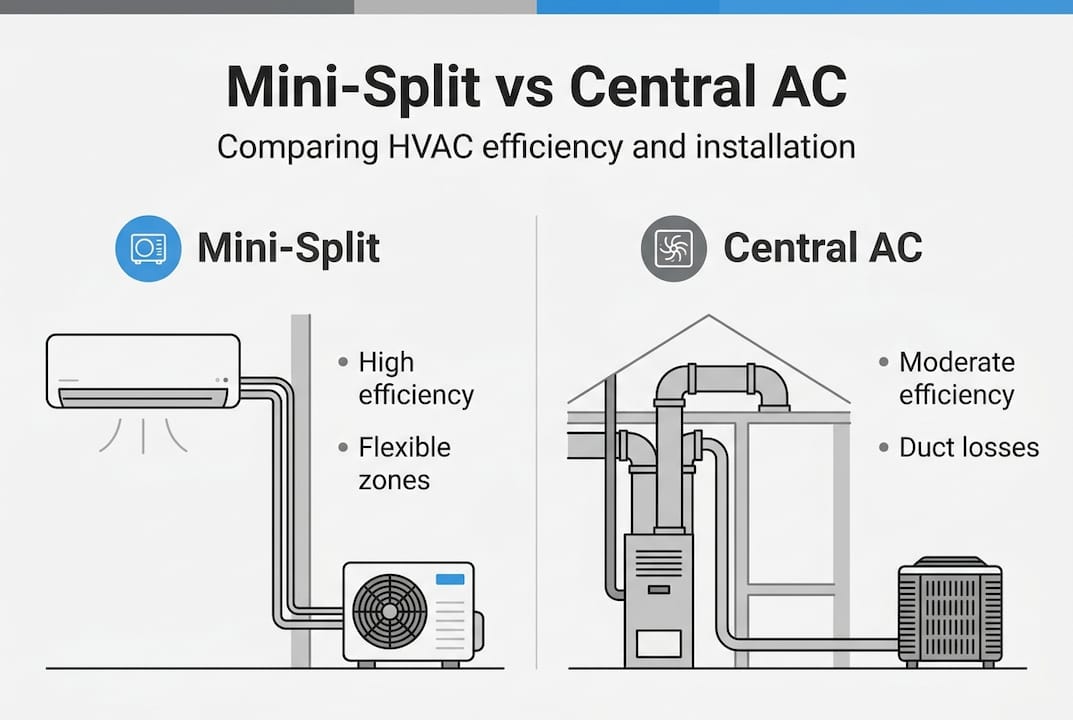
Mini-split vs. traditional systems: A quick comparison
| Feature | Mini-split | Central AC with ducts |
|---|---|---|
| Energy efficiency | Very high | Moderate |
| Duct losses | None | 20-30% |
| Zoning capability | Per room | Limited |
| Installation disruption | Low | High |
| Upfront cost | Moderate to high | High |
| Ideal for | Additions, older homes | New builds |
Installation quality matters just as much as the unit itself. A poorly installed mini-split underperforms, runs constantly, and burns through energy. The brand and SEER rating on the box mean nothing if the unit is mounted in the wrong spot or charged with the wrong refrigerant amount. Now that you see the value in mini-splits, let’s cover what you need before starting your installation.
Preparation: Sizing, tools, and materials checklist
Skipping the prep phase is where most homeowners get into trouble. Improper sizing is the most common mini-split mistake; use Manual J calculations, not rough square-foot rules, to get it right.
Manual J is the industry-standard load calculation method. It accounts for your home’s insulation, window placement, ceiling height, local climate, and even how many people live in the space. A room that is 300 square feet in Newark, DE behaves very differently in summer humidity than the same room in a dry climate. Square-foot rules ignore all of that.
Review proper HVAC sizing tips before committing to a BTU rating. Oversizing causes short cycling, which wears out components fast and leaves the room feeling clammy. Undersizing means the unit runs nonstop and still can’t keep up on the hottest days.
Tools you’ll need for installation:
- Hole saw (typically 2.5 to 3 inches)
- Stud finder
- Level
- Pipe cutter and flaring tool
- Torque wrench (critical for flare connections)
- Vacuum pump and manifold gauge set
- Wire stripper and multimeter
- Drill and drill bits
- Fish tape for running wires
Materials checklist:
| Item | Purpose |
|---|---|
| Refrigerant line set | Connects indoor and outdoor units |
| Line set insulation | Prevents energy loss and condensation |
| UV-resistant tape/wrap | Protects exterior line runs |
| Electrical wire (correct gauge) | Powers the system safely |
| Dedicated circuit breaker | Matches unit amperage requirements |
| Drain line and fittings | Channels condensate away from the unit |
| Mounting bracket | Secures outdoor compressor unit |
| Wall sleeve or conduit | Protects lines through the wall |
Before you start, check with New Castle County or your local municipality about permit requirements. Most mini-split installs in Newark, DE require an electrical permit, and some require an HVAC permit as well. Review the AC installation guidelines to understand what is typically required locally.
Pro Tip: Pull the permit before you start, not after. Inspectors can require removal and reinstallation if the work was done without approval, which costs far more than the permit fee itself.
Once you’ve gathered your tools and sized your system, it’s time to dive into the installation steps.
Step-by-step installation process
Installation takes 4-8 hours for a single-zone system, whether you’re doing it yourself or working with a pro. The key is following the correct sequence so nothing gets missed.
1. Choose and mark the indoor unit location
Mount the unit high on an interior wall, away from direct sunlight and heat sources. Keep it at least 6 inches from the ceiling for proper airflow. Use your stud finder to locate studs, because the mounting plate must anchor into them to prevent vibration and noise.
2. Install the mounting plate
Use a level to confirm the plate is perfectly horizontal. A slightly tilted unit causes the drain to back up and can lead to water damage inside your wall or on your floor.
3. Cut the wall opening
Drill the conduit hole at a slight downward angle toward the outside. This helps the drain line flow naturally without pooling.
4. Run the refrigerant lines and cables
Feed the line set, drain line, and electrical cable through the wall opening together. Insulate the refrigerant lines completely, including any sections exposed to sunlight outside. UV-resistant wrap prevents insulation breakdown over time.
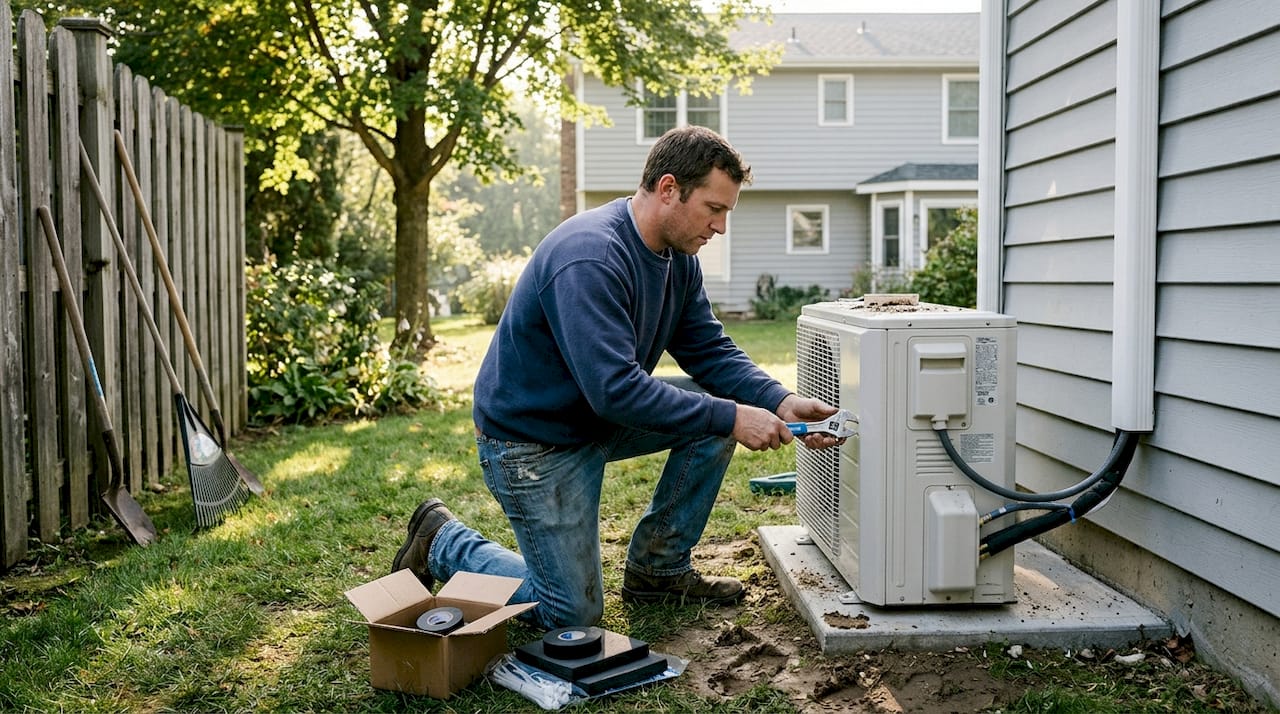
5. Mount and connect the outdoor unit
Place the outdoor compressor on a level pad or wall bracket, away from shrubs and at least 12 inches from any obstruction. Secure all flare connections with a torque wrench to the manufacturer’s specifications. Consult the permit advice for AC page for local code specifics.
6. Wire the dedicated electrical circuit
Run the correct gauge wire from your breaker panel to the outdoor unit disconnect box. A dedicated circuit prevents tripping and protects the compressor.
7. Vacuum the line set
This is the step most DIYers skip, and it is one of the most important. Use a vacuum pump to pull the lines down to 500 microns or lower. This removes moisture and non-condensables that would otherwise damage the compressor.
8. Release refrigerant and test
Once vacuum holds, open the service valves on the outdoor unit to release the pre-charged refrigerant. Power on the system and confirm it operates in both heating and cooling modes.
Always slope the drain line at least 1/4 inch per foot toward the exit point. A flat or upward-sloping drain is one of the most common causes of water damage after installation.
With your unit installed, let’s address issues and mistakes that impact efficiency.
Troubleshooting, common mistakes, and post-install checks
Even a careful installation can have hidden problems. The most frequent mistakes include kinked refrigerant lines, poorly insulated pipes, wrong electrical wiring, no torque on flares, and drains that are not sloped properly. Catching these early saves you from a refrigerant leak, water damage, or a failed compressor.
Post-install checklist:
- Run the system in cooling mode for 15 minutes and feel for cold air at the unit
- Run it in heating mode and confirm warm air output
- Check the drain line by pouring a small amount of water into the indoor unit’s drain pan
- Look for vibration or rattling at the mounting plate and outdoor unit
- Confirm the remote or app controls respond correctly
- Inspect all refrigerant line connections for oily residue, which signals a leak
- Verify the outdoor unit fan spins freely and without noise
Common problems and fixes:
| Problem | Likely cause | Fix |
|---|---|---|
| Water dripping indoors | Drain line not sloped or clogged | Re-slope or clear the drain line |
| Unit not cooling | Low refrigerant or kinked line | Call a certified technician |
| Loud vibration | Loose mounting or unlevel pad | Tighten mounts, re-level |
| Circuit breaker tripping | Wrong wire gauge or shared circuit | Install dedicated circuit |
| Remote not responding | Pairing issue or dead batteries | Re-pair per manual instructions |
Review common HVAC mistakes to see which habits homeowners fall into that raise energy bills even after a good install. And if you’re facing refrigerant issues or electrical faults, know which AC repairs to avoid DIY before you make things worse.
When in doubt, stop and call a pro. Refrigerant handling requires EPA 608 certification. Electrical work inside a panel carries serious safety risks. Some tasks simply shouldn’t be DIY.
You’ve seen how to tackle issues. Now, discover our unique perspective on achieving HVAC excellence in Newark, DE.
Our perspective: What truly separates a successful mini-split install
After working on mini-split installations across Newark, DE, we’ve seen a pattern: most underperforming systems aren’t the result of cheap equipment. They’re the result of skipped steps that seemed optional at the time.
The vacuum pull is the biggest one. Homeowners who do everything else right but skip this step end up with a compressor that fails years ahead of schedule. Deep vacuum and proper torque tools are not optional extras. They directly determine how long your system lasts and how efficiently it runs every day.
Mount placement is another area where we see costly decisions. An indoor unit installed in a corner with poor airflow, or an outdoor unit tucked against a fence, fights against itself constantly. The unit works harder, wears faster, and delivers less comfort.
Our honest take: the equipment cost is rarely what separates a great install from a mediocre one. It’s the knowledge of where to place units, how to pull a proper vacuum, how to torque flares, and how to size using real load calculations instead of guesswork. That’s what HVAC sizing expertise actually looks like in practice. Investing in professional installation pays back in comfort, lower bills, and a system that doesn’t need replacing years too soon.
Where to find trusted mini-split installation help in Newark, DE
Doing your own research is a great first step. But there are moments when having a licensed, experienced professional handle the work makes all the difference between a system that performs for 20 years and one that struggles from day one.
At Enhanced Heating & Air Conditioning, we handle everything from choosing the best HVAC install location for your specific home layout to pulling permits, running electrical, and completing the vacuum process correctly. If something goes wrong after install, our HVAC repair in Newark team is local and ready to help fast. Explore all of our HVAC services Newark DE and schedule your free consultation today. We’re BBB accredited and committed to transparent pricing with no surprises.
Frequently asked questions
How long does it take to install a mini-split system?
A single-zone mini-split typically takes 4-8 hours to install, whether done by a homeowner or a professional technician.
What mistakes should I avoid when installing a mini-split?
Avoid improper sizing, kinked lines, uninsulated pipes, incorrectly wired circuits, and drain lines that aren’t sloped at least 1/4 inch per foot.
Does installing a mini-split really cut energy costs?
Yes. Mini-splits deliver 30-50% energy savings compared to ducted HVAC systems because they eliminate duct losses and allow precise room-by-room temperature control.
Should I DIY or hire a pro for mini-split installation?
DIY is possible for handy homeowners, but a pro ensures sizing, mounting, and electrical work meets code, which protects your warranty and extends system life.
Recommended
- HVAC Zoning: Cut Bills 30% And Boost Home Comfort
- Blog | Enhanced Heating And Air Conditioning
- Home Thermostat Settings: Comfort & Savings Guide (2025)Enhanced Heating and Air Conditioning
- How to Installation Air Conditioning Without Permit Delays | Enhanced Heating and Air ConditioningEnhanced Heating and Air Conditioning